
Save and restore an edit
A snapshot is a saved state of an edit. Fotometis keeps every state of a photo in a tree, so you can try one look, go back, then try another.
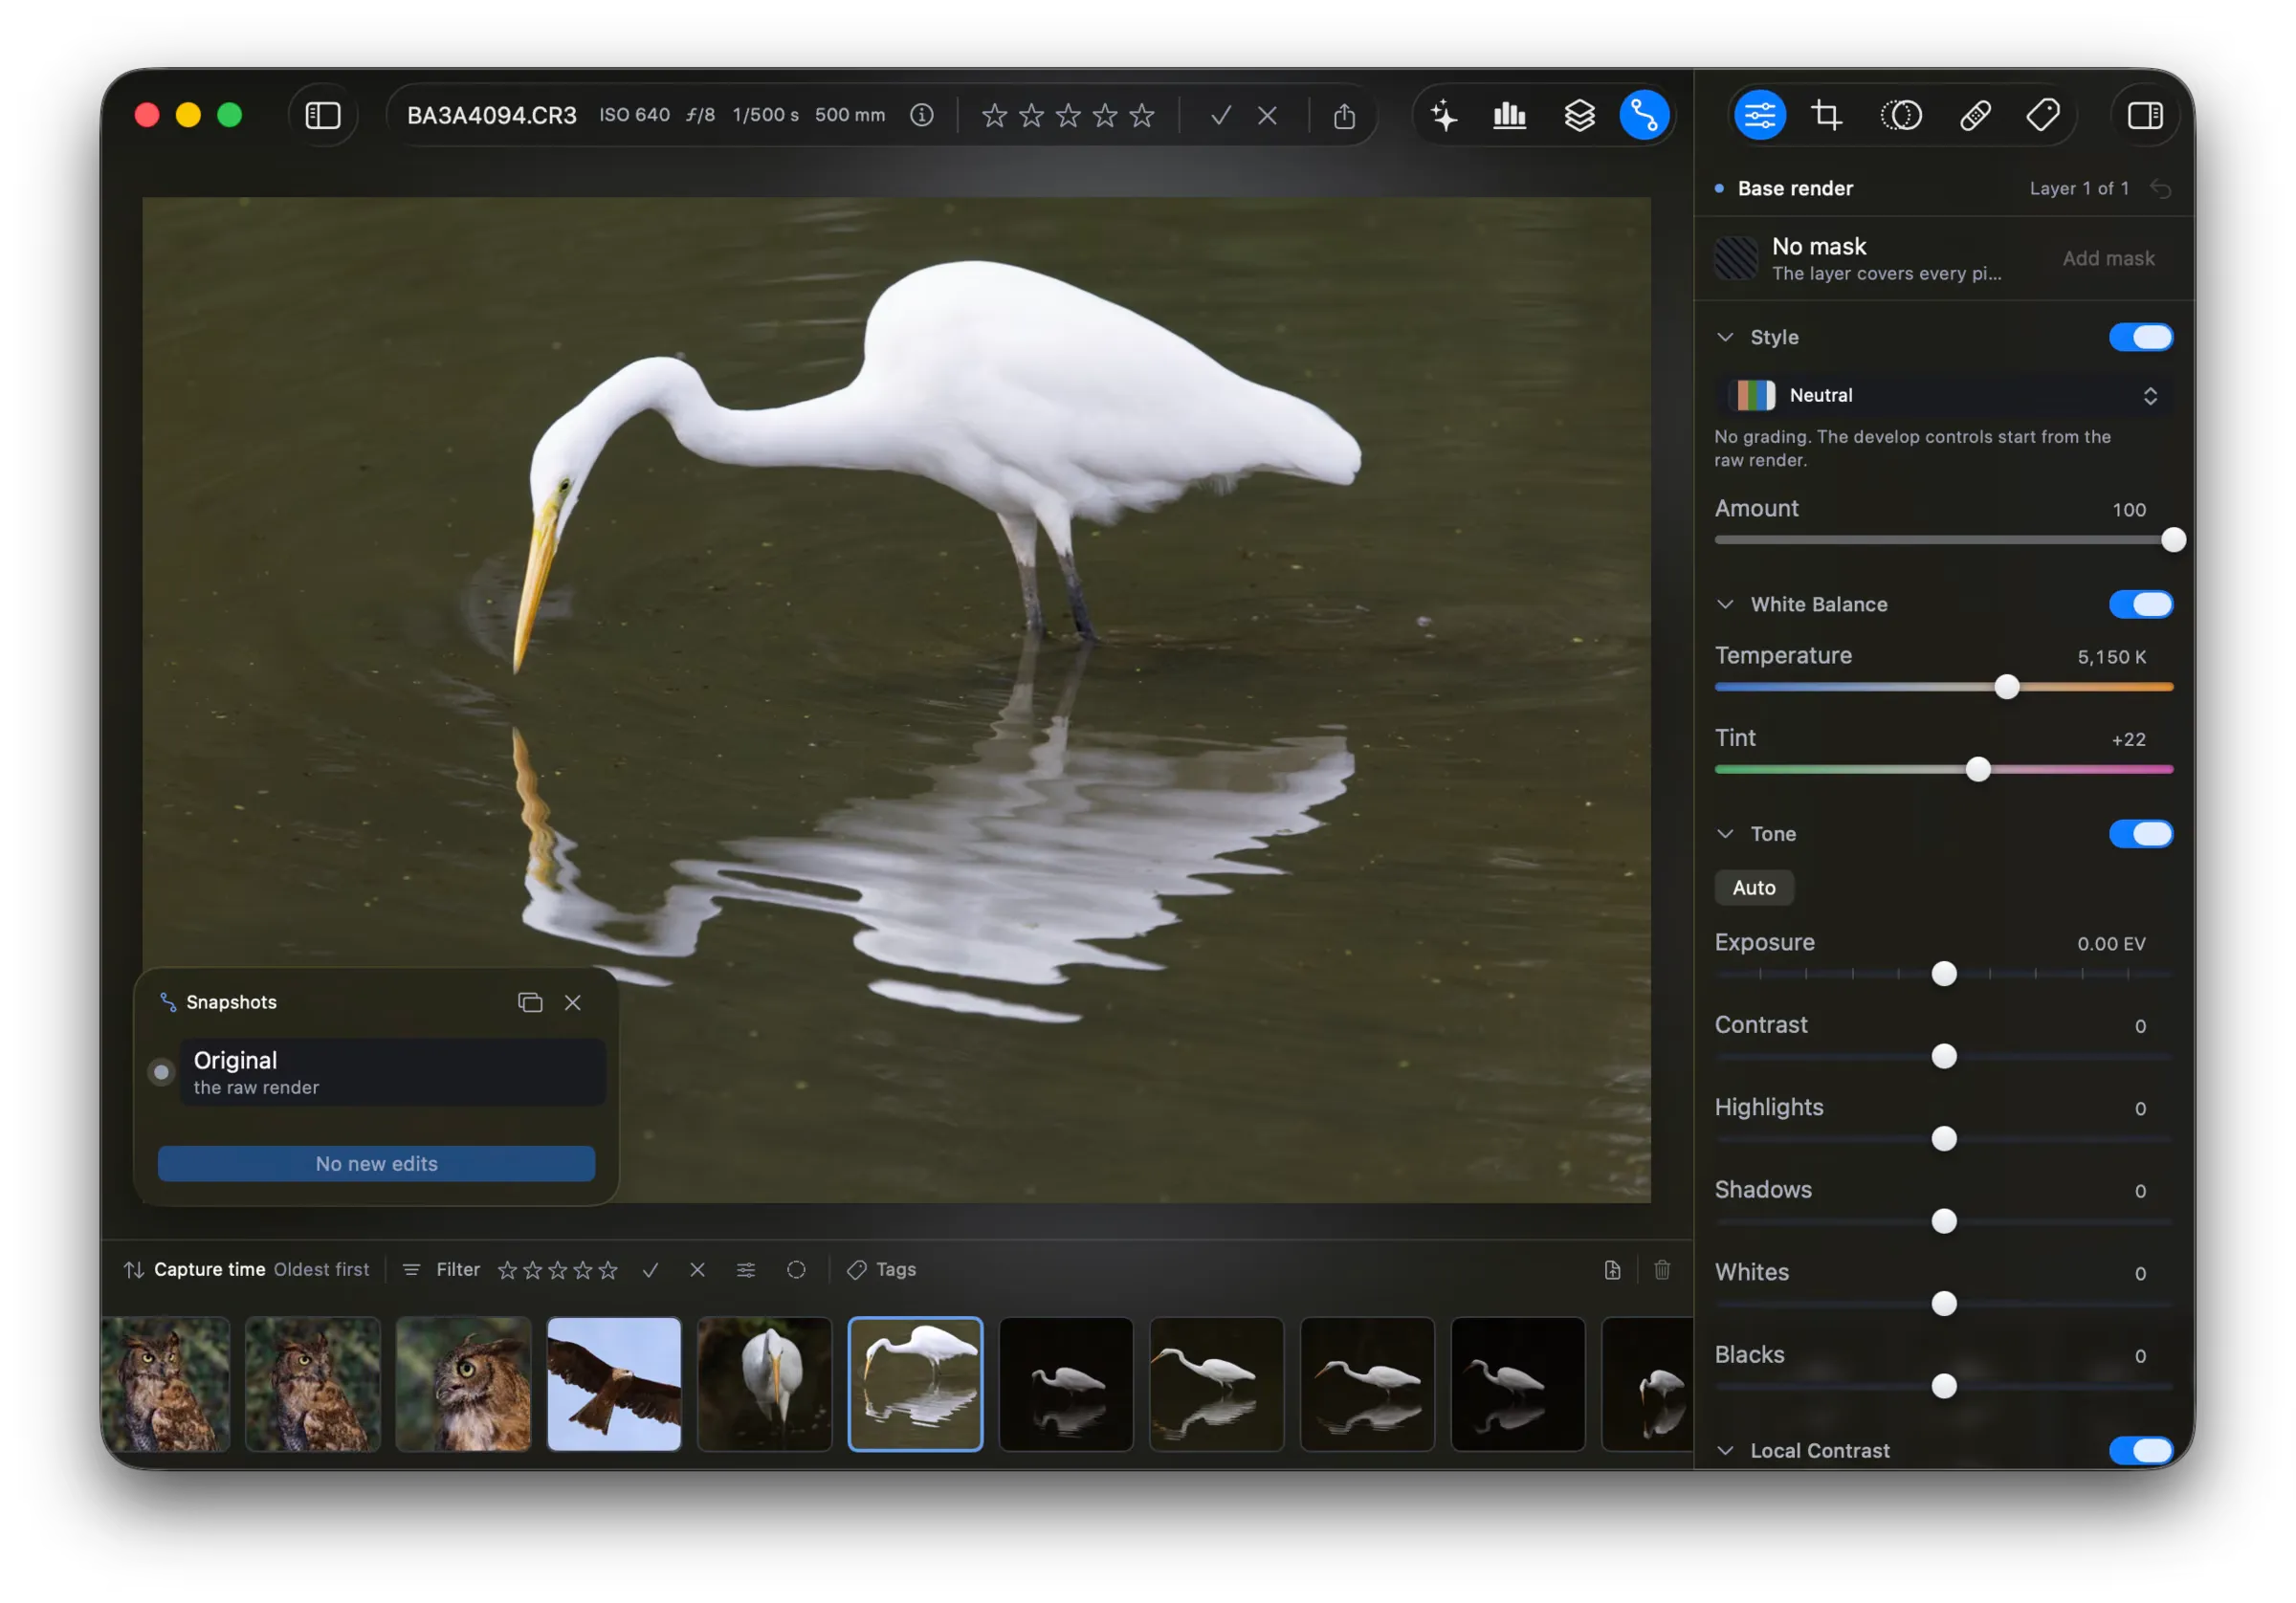
Open the Snapshots pane
Section titled “Open the Snapshots pane”Click the snapshots button in the pane bar. The pane floats over the bottom left of the canvas. Drag the header to move it. Click the cross to close it.
Every photo starts with one row, Original. Its subtitle reads “the raw render”. You cannot delete it.
Save a snapshot
Section titled “Save a snapshot”- Move the develop controls.
- Open the Snapshots pane.
- Click Save snapshot.
The button reads No new edits while nothing changed. Fotometis calls the work in progress Working edits until you save it. Saving keeps the photo exactly as it looks.
Name a snapshot
Section titled “Name a snapshot”Double click the row’s name. Type the name. Press Return, or click away from the field.
A snapshot you did not name goes by its number, for example “Snapshot 2”. The number never changes, so deleting one snapshot does not renumber the rest.
Return to a snapshot
Section titled “Return to a snapshot”Click a snapshot row to return to that state.
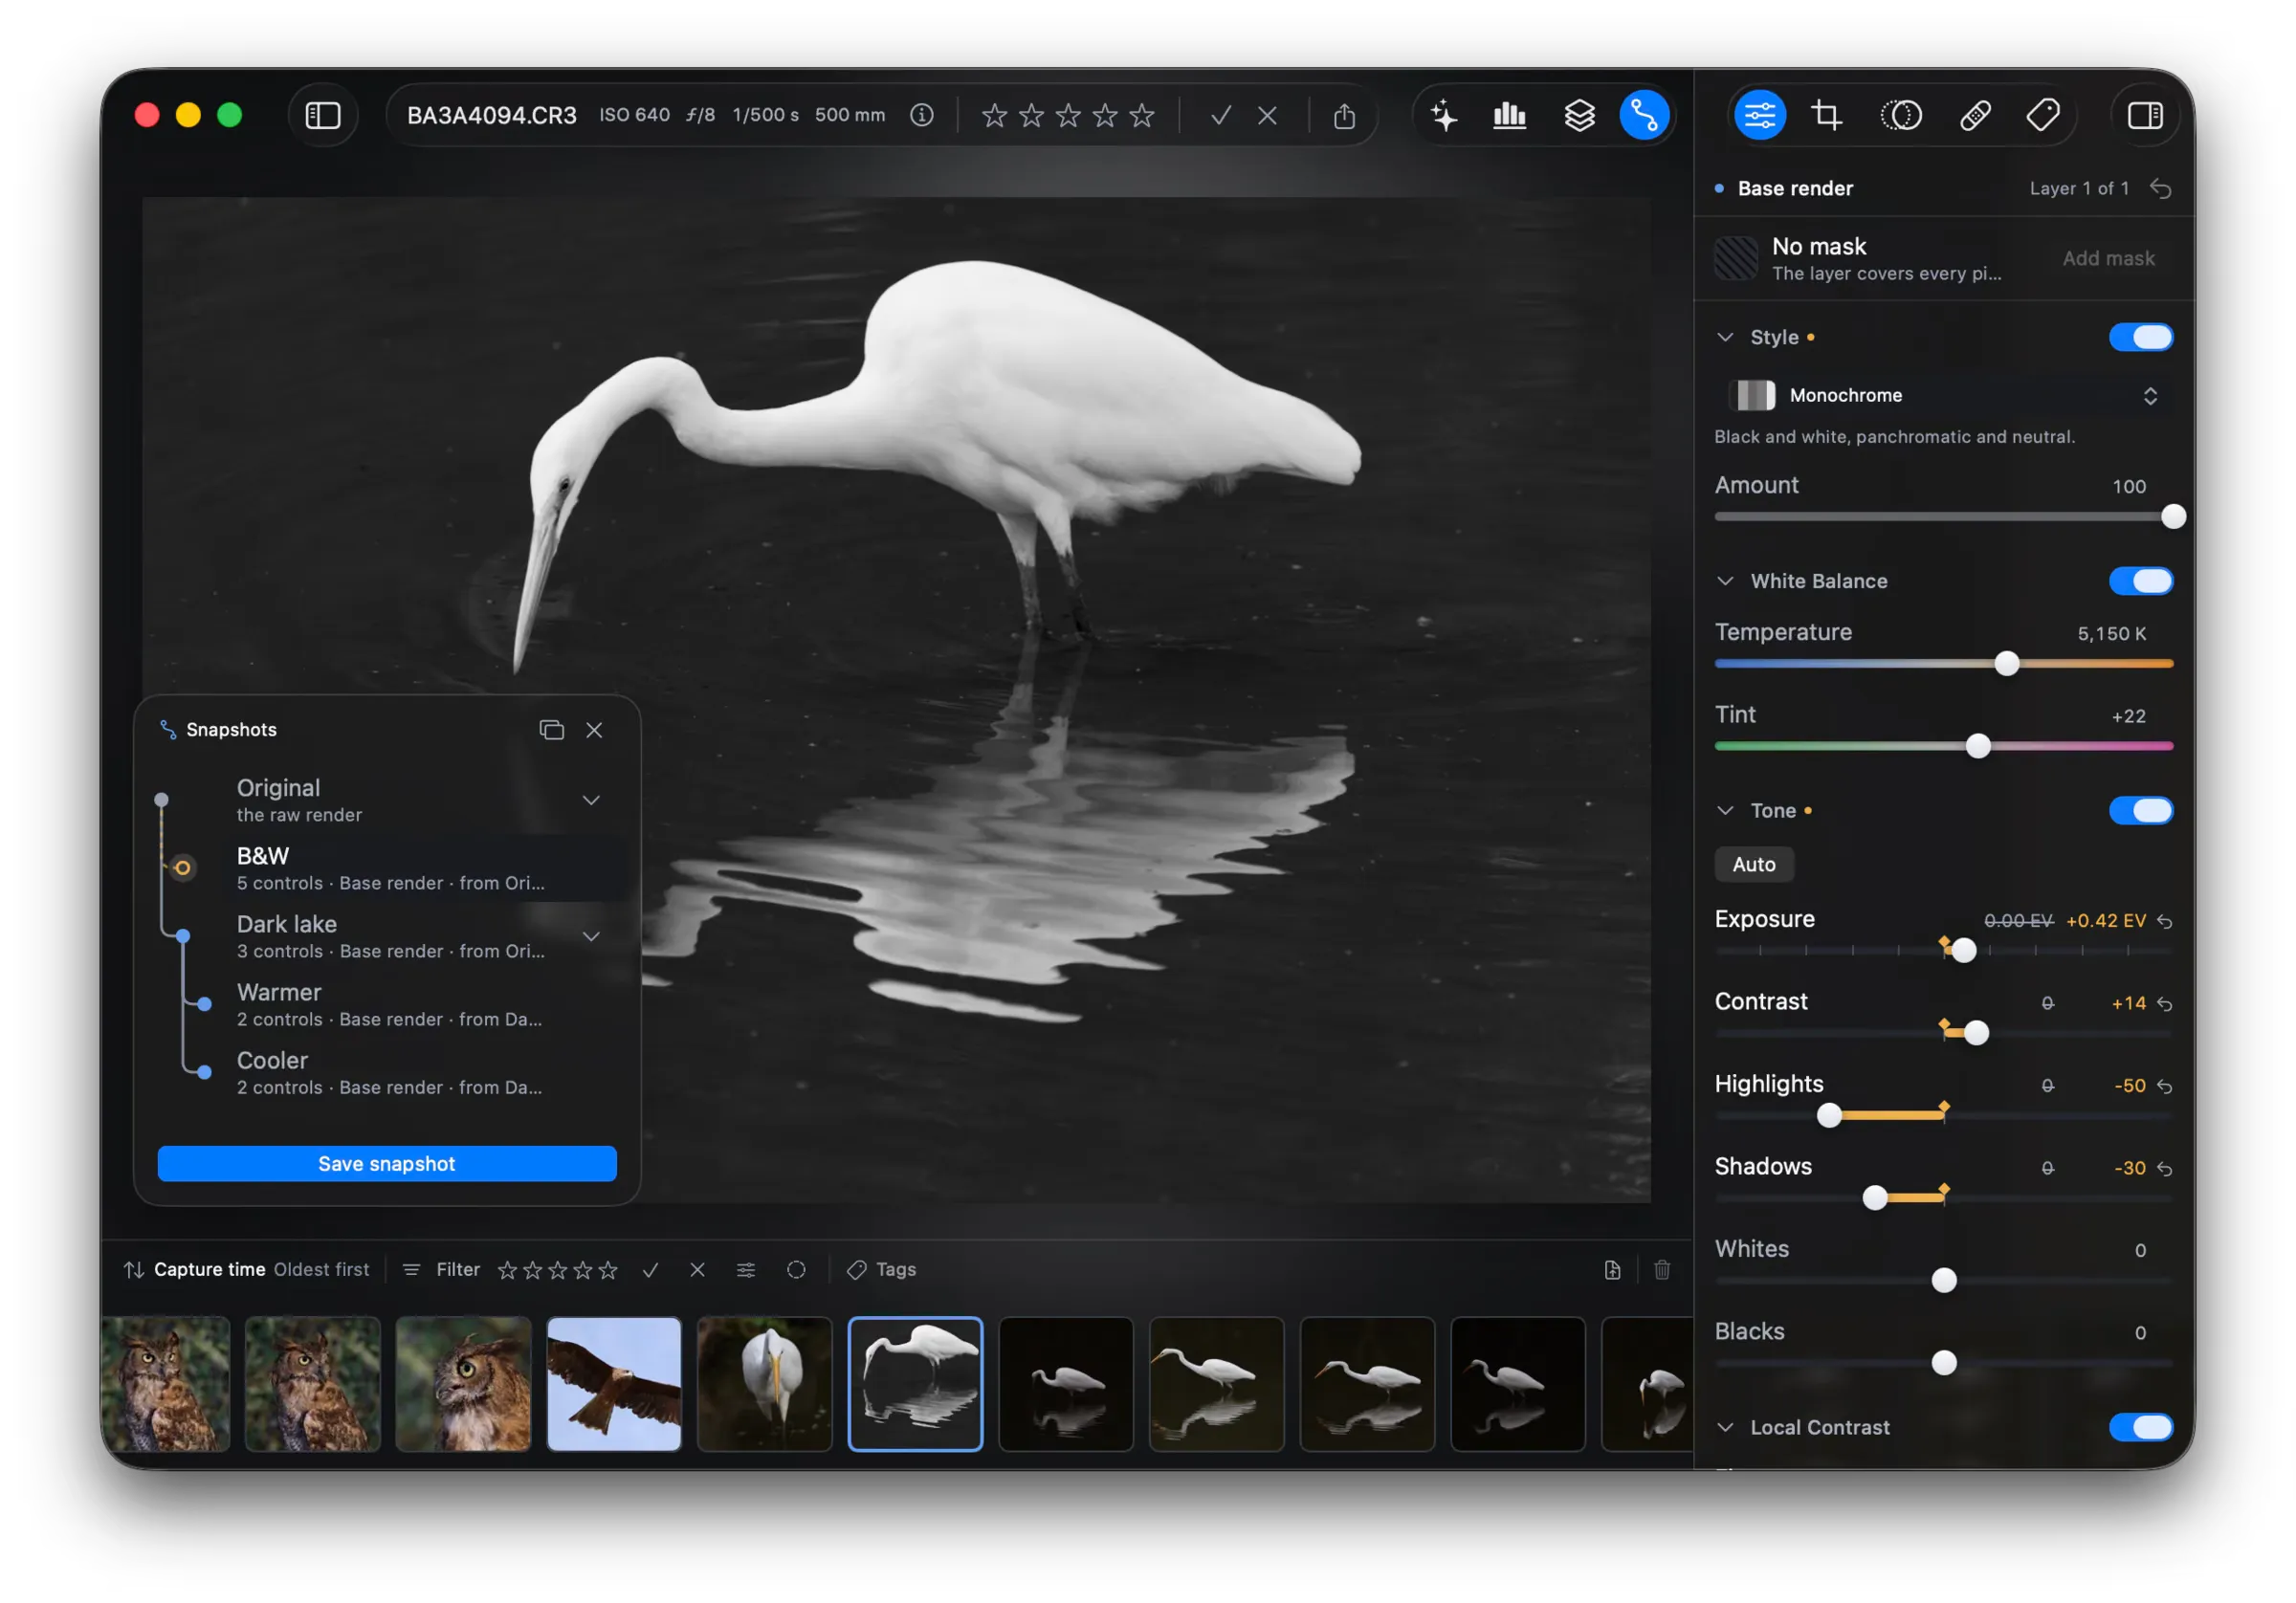
A saved snapshot never changes. Move a control while a saved snapshot is selected, and Fotometis starts a draft under it, named Working edits. Save the draft to keep it.
Read the tree
Section titled “Read the tree”The dot at the left of a row says which it is.
- An orange ring is a draft.
- A filled blue dot is a saved snapshot.
- The line into a draft is dashed.
- The tree branches wherever two drafts grow from the same snapshot.
The gutter at the left of the pane draws the branches.
To fold a branch away, click the chevron at the right of its row. Click the chevron again to show it.
Compare two snapshots
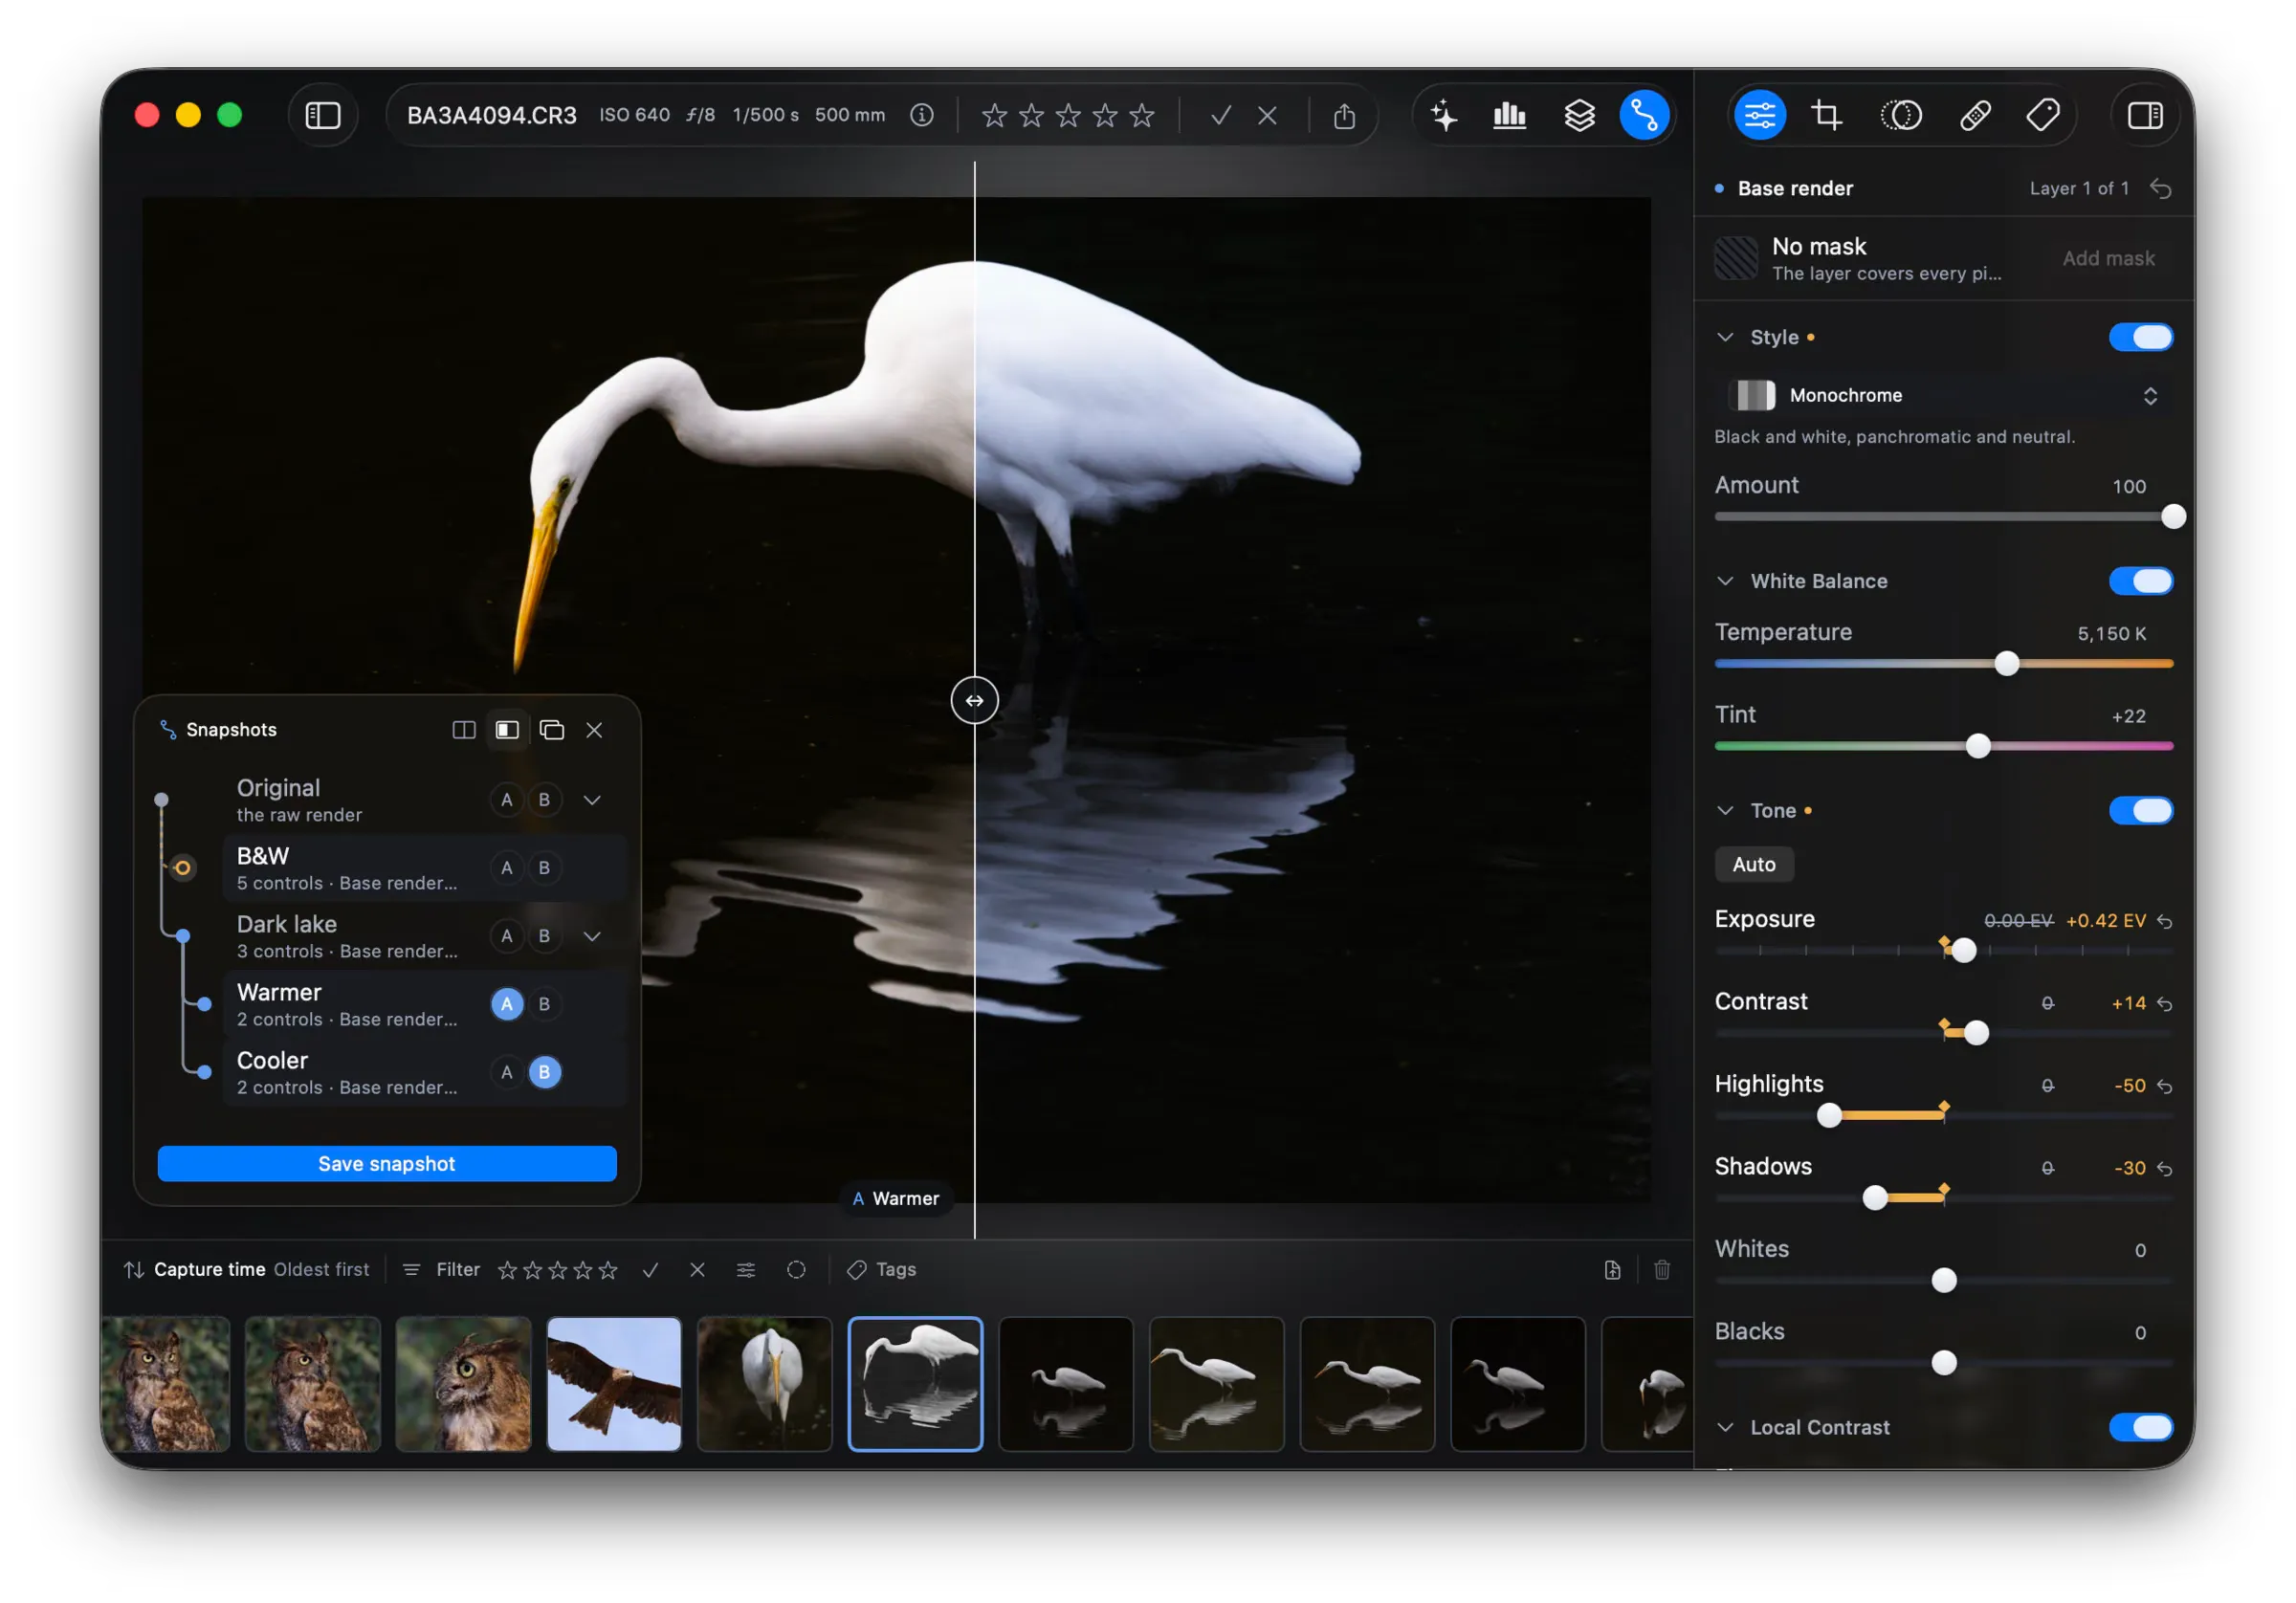
Section titled “Compare two snapshots”- Click the compare button in the pane header.
- Click A on one row, and B on another.
- Pick the layout: side by side, or split.
The canvas shows both states at once. The badge on each frame names the snapshot. Drag the handle in the middle to move the split.
You cannot move the photo by clicking a row while a comparison shows. Click the compare button again to leave the comparison.
The same two layouts are in the View menu, on Y and ⇧Y. See Keyboard shortcuts.
Change a saved snapshot
Section titled “Change a saved snapshot”Merge Into Previous is the only way to change a saved snapshot.
- Click the snapshot you want to change.
- Move the controls. Fotometis puts the work in a draft under it.
- Click Save snapshot.
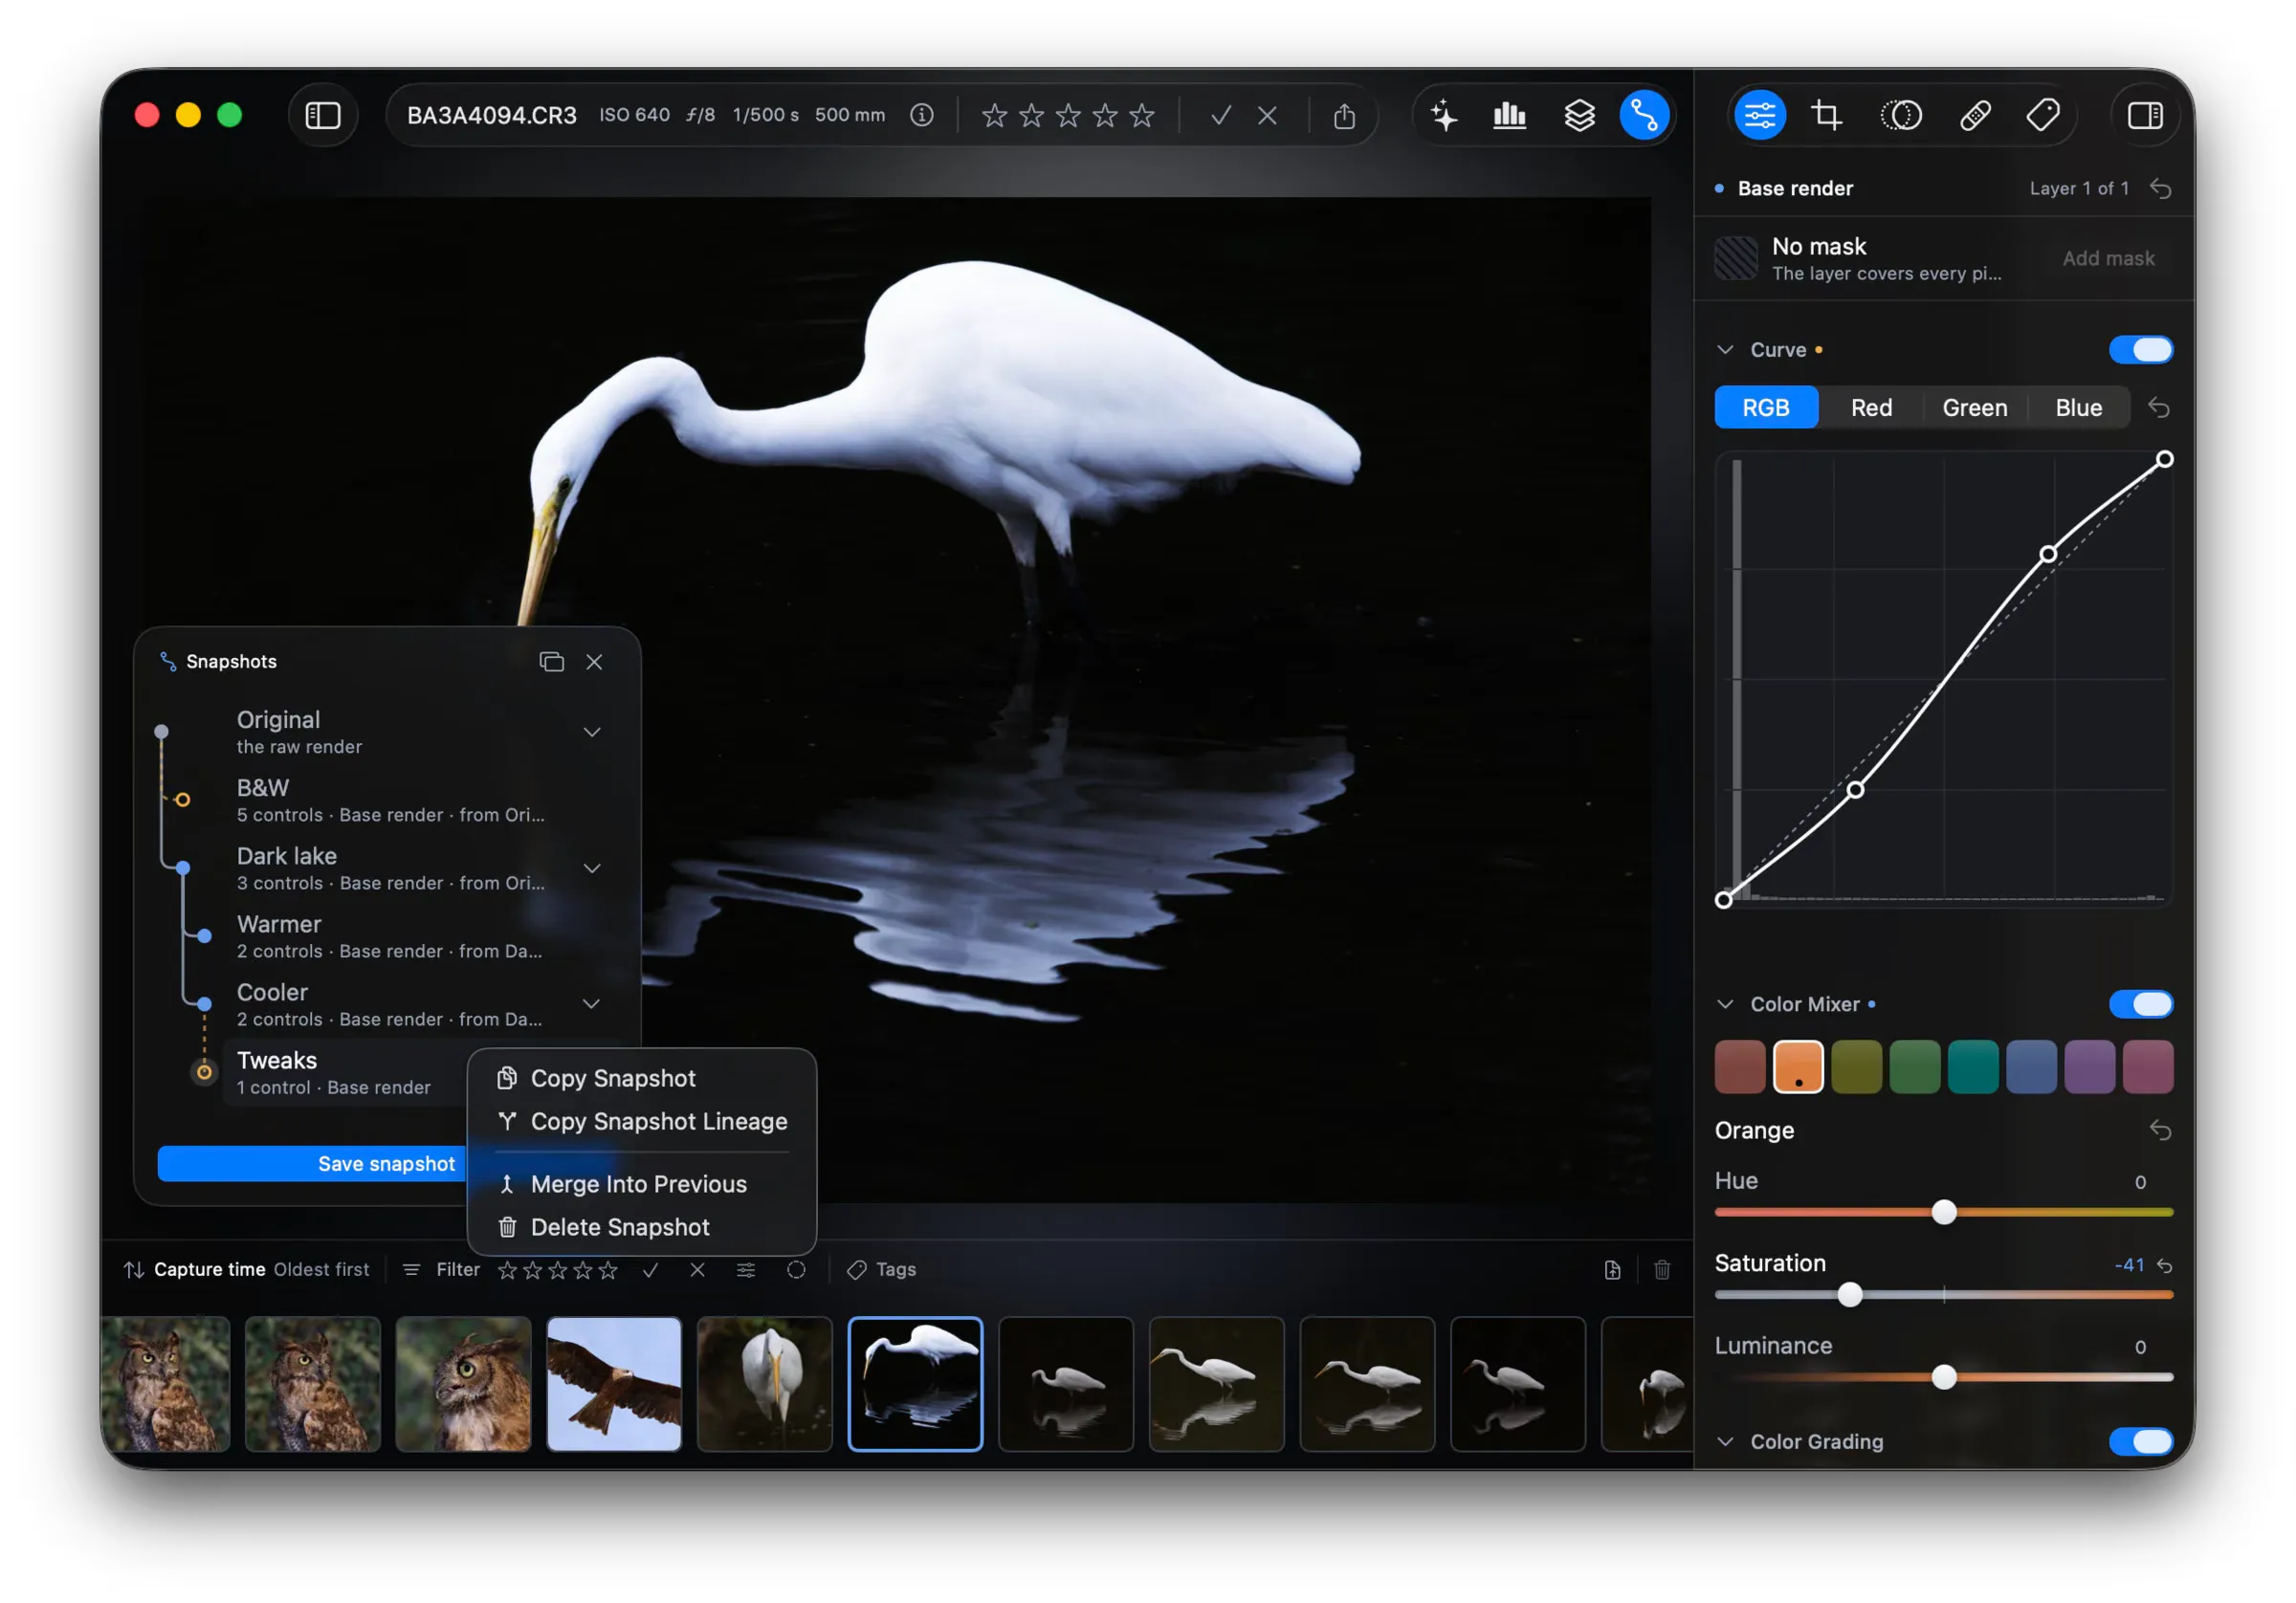
- Right click the new row, then click Merge Into Previous.
The snapshot below takes the values of the new one, and the new row goes away. The photo stays exactly as it looks. You cannot merge into Original.
Delete and copy
Section titled “Delete and copy”Right click a row for the rest of the actions.
- Delete Snapshot removes the state. The states built on it move down to its parent. Fotometis asks first if the row carries work below it.
- Copy Snapshot takes the state on its own. Copy Snapshot Lineage takes the whole path that led to it.
- Paste Snapshot grows what you copied onto the row you right clicked.
Snapshots and the assistant
Section titled “Snapshots and the assistant”The assistant works in the same tree that you do. It can list the snapshots, save one under a name, and return the photo to one.
The assistant cannot change a snapshot you already saved. Save your work before you prompt the assistant. An edit you did not want then lands on a new state, and the one you saved stays as it is.
The assistant cannot merge snapshots, because a merge is destructive.
See Prompt the assistant.
Snapshots and undo
Section titled “Snapshots and undo”Undo and a snapshot answer different questions.
- ⌘Z takes back the last change to the photo on the canvas. Fotometis holds 50 steps for each photo, in memory. Quitting the app clears them.
- A snapshot is written to the sidecar file beside the photo. It stays after you quit, and you can return to it weeks later.