
Develop a photo
The develop controls set the look of the photo by hand. Each control writes a parameter, and the raw file never changes.
Open the develop controls
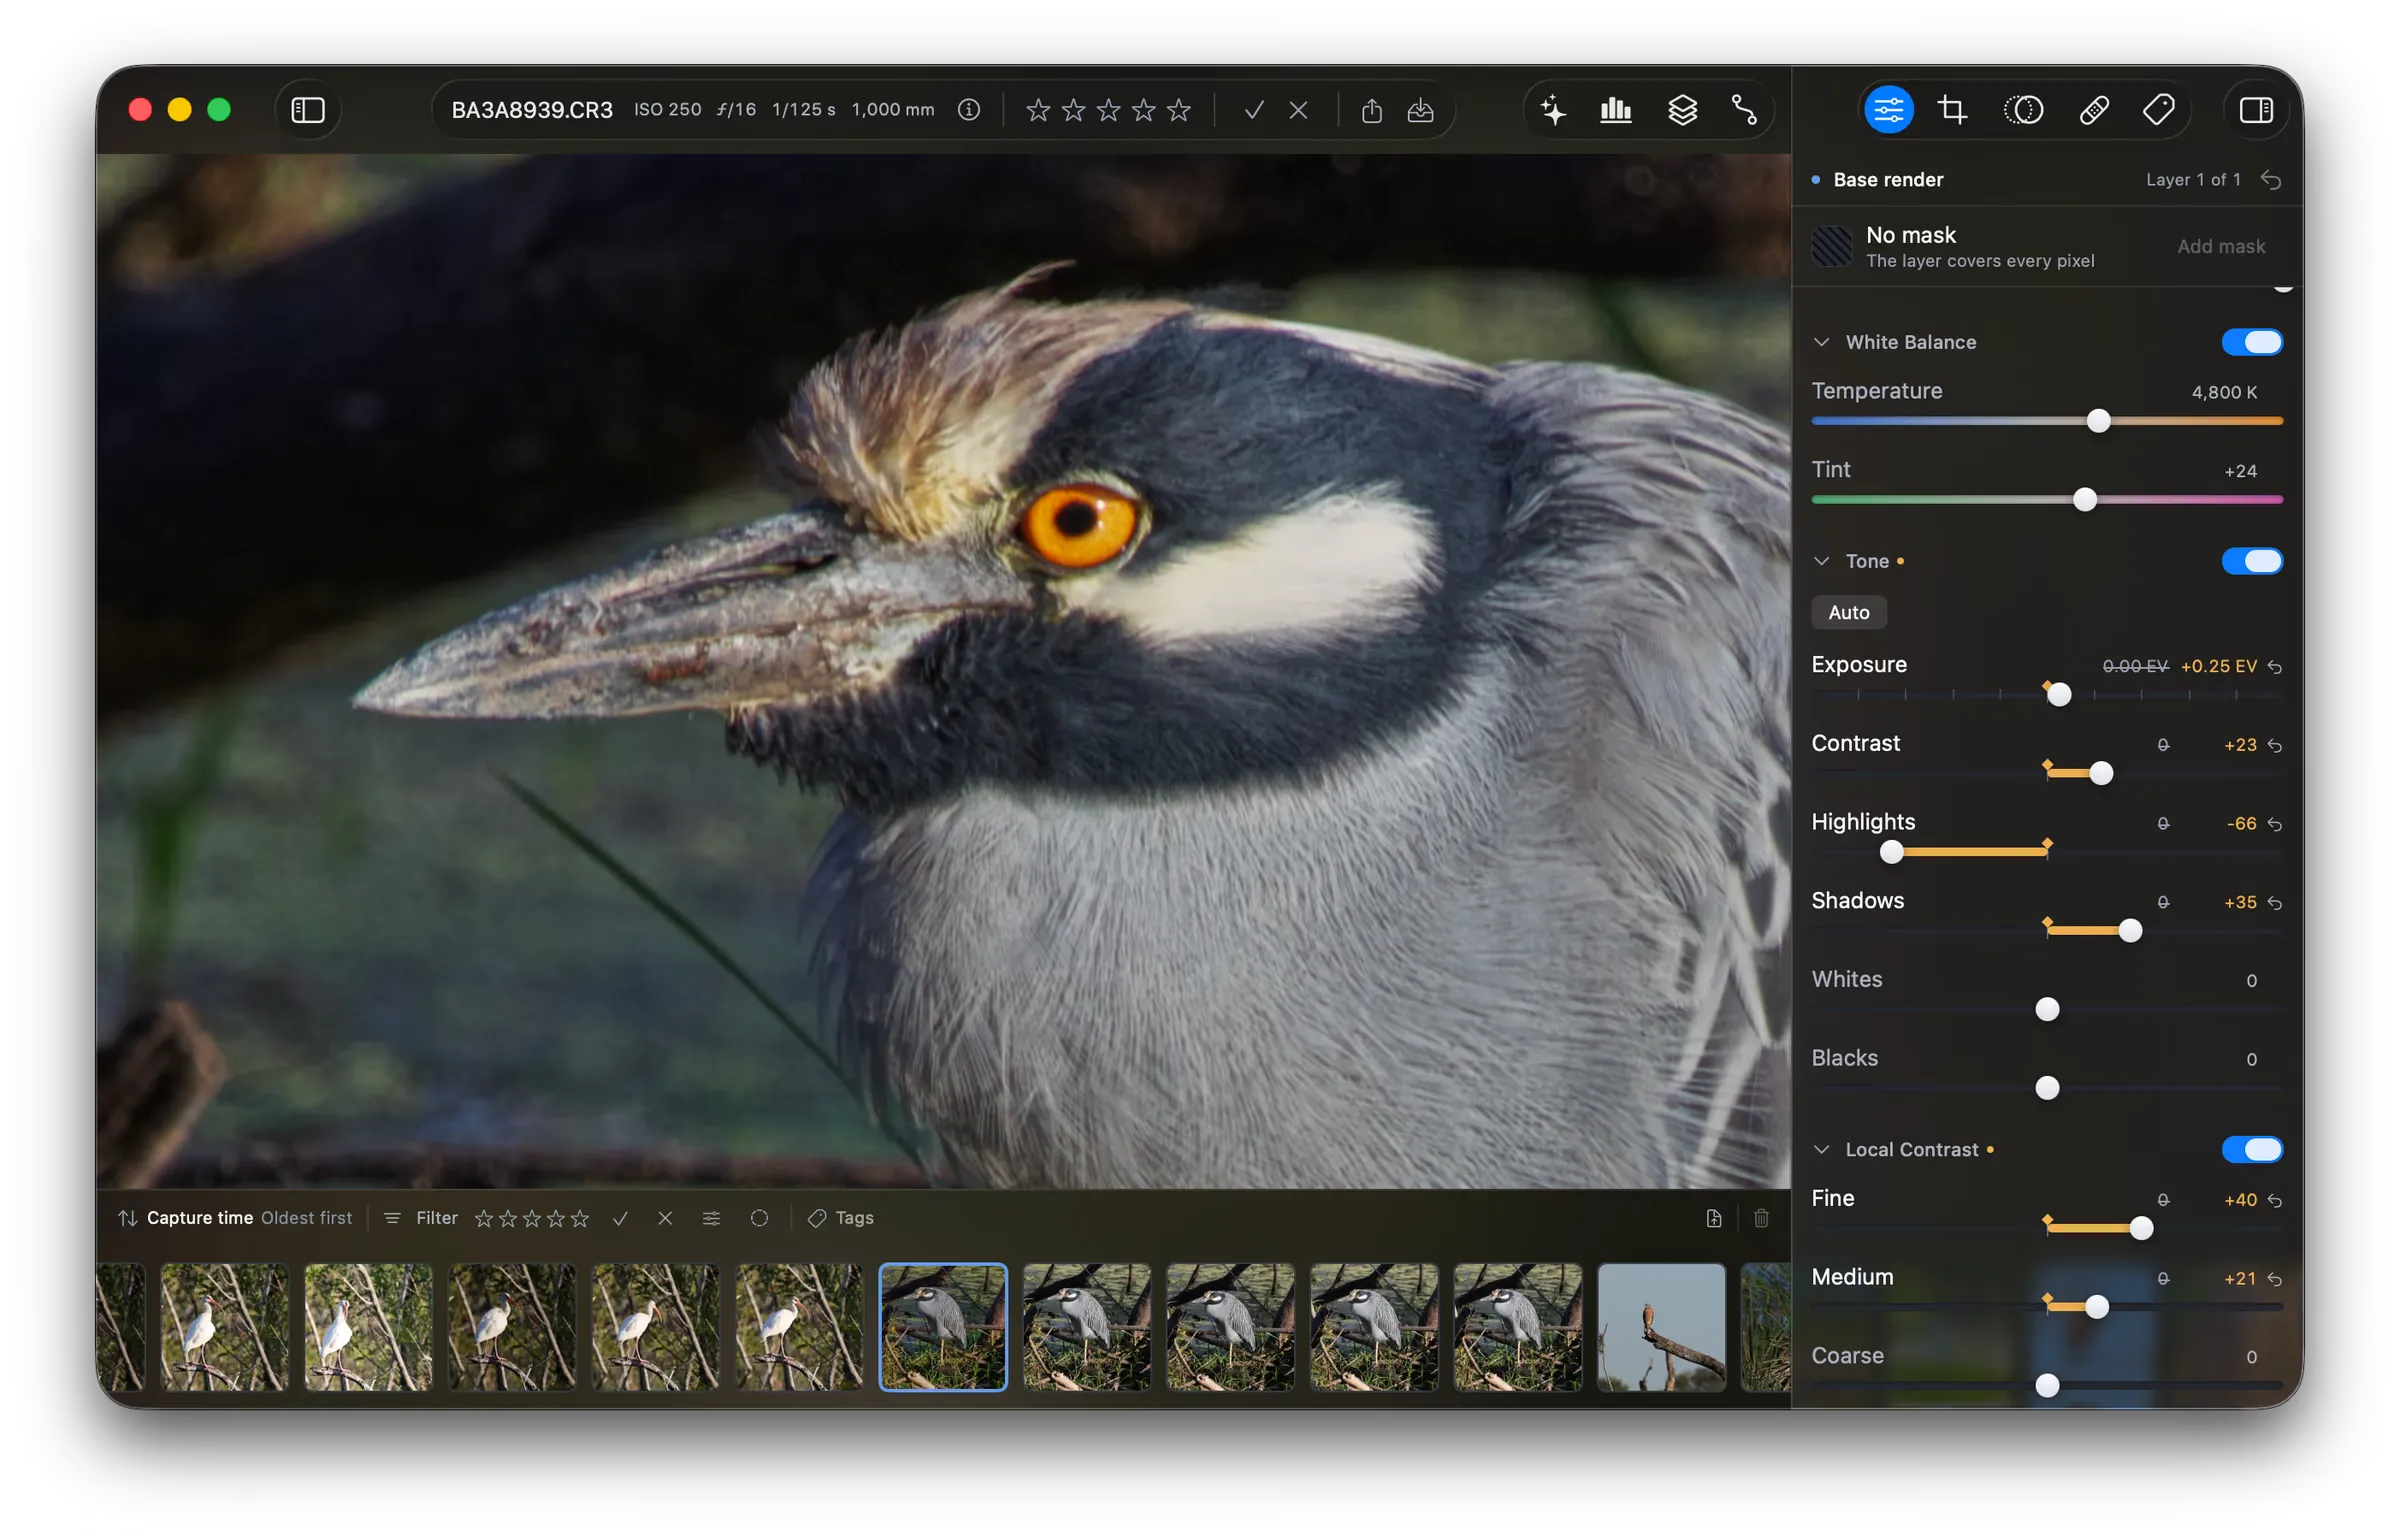
Section titled “Open the develop controls”Click the first tab of the tool sidebar. The header names the selected layer, for example “Base render, Layer 1 of 1”. On a new photo, the mask row reads “No mask”, so the controls reach every pixel. To aim a control at one part of the photo, see Add layers and masks.
Set the white balance
Section titled “Set the white balance”Drag Temperature to remove a color cast. The track runs from blue to yellow, and the readout is in kelvin. Drag Tint to balance green against magenta.
Set the tone
Section titled “Set the tone”Click Auto for a starting point. Auto reads the photo and sets the six tone controls. It measures the photo with the controls at neutral, so a second click gives the same answer. The result is an ordinary edit: drag any control away from it, or undo it.
Then shape the result:
- Exposure sets the brightness. The readout is in EV.
- Contrast spreads the tones apart.
- Highlights and Shadows set the bright parts and the dark parts. In the screenshot, Highlights at -66 brings back the bright feathers, and Shadows at +35 opens the dark water.
- Whites and Blacks set the two ends of the range.
Add local contrast
Section titled “Add local contrast”The Local Contrast group adds contrast at three sizes: Fine for detail, Medium, and Coarse for large shapes.
The other groups
Section titled “The other groups”The remaining groups set the style, the color, the curves, and the grain. The second tab of the tool sidebar crops the photo. See The Fotometis window for every group and its controls.